Who am I?
Introduce yourself
Pastor's kid – moved around
Call Nashville home, coming up on 9 years in a row here
I'm also a musician and play with the Band The Vibe Dials.
WordCamp Nashville 2013
Introduce yourself
Pastor's kid – moved around
Call Nashville home, coming up on 9 years in a row here
I'm also a musician and play with the Band The Vibe Dials.

The three loves of my life: Anna, Ginger, and Asher

I've been working with WordPress since 2007, starting as a blogger on WordPress.com and eventually learning to build sites with the downloadable version.
I've been developing plugins for two years and I started with a widget for BuddyPress.
I currently do development and design under the name Slushman. You can view my portfolio and contact me at slushman.com
My most popular plugin is ArtistDataPress, which allows musicians to style their ArtistData calendars to match their WP sites.

During the day, I work at Belmont University as a computer technician and web admin for the Mike Curb College of Entertainment and Music Business. I'm also currently working towards a web development degree while I build sites, design themes, and code plugins for the CEMB sites.

Let's jump in
How many have already developed their widget?
How many are starting development?
If you're planning to build your own widget, it should be written as a separate plugin. You have the advantage of removing the widget without affecting your theme or the WordPress core code.
FYI – we're going to take a look at some boilerplate code I've written for creating widgets. This file will be available for download from my website: slushman.com.
When you create a plugin, there are a several things you'll need at the top of your file.
Plugin name – the name of your plugin
Plugin URI – where you have info about this plugin
Description – a brief description of what your plugin does
Version – the version of your plugin
Author – who wrote this
Author URI – where can people contact you
License – the rules about how people can use your work. Most WordPress plugins use GPL2
            Plugin Name: Boilerplate Widget
            Plugin URI: https://slushman.com/plugins/boilerplate-widget
            Description: Boilerplate code to start building your widget.
            Version: 0.1
            Author: Slushman
            Author URI: https://www.slushman.com
            License: GPLv2
Here's an example from our Boilerplate Widget code.
***********************************************************************
Copyright (C) 2013 Slushman
This program is free software: you can redistribute it and/or modify
it under the terms of the GNU General License as published by
the Free Software Foundation, either version 3 of the License, or
(at your option) any later version.
This program is distributed in the hope that it will be useful,
but WITHOUT ANY WARRANTY; without even the implied warranty of
MERCHANTABILITY or FITNESS FOR A PARTICULAR PURPOSE. See the
GNU General License for more details.templates/classic.php
You should have received a copy of the GNU General License
along with this program. If not, see
This is the full GPL2 notification. Adding at the top of your plugin is completely optional, but recommended.
class boilerplate_widget extends WP_Widget {
This would be the first line of code for your widget.
For those who aren't experienced developers, you're probably wondering:
A class is a set of instructions to build a specific type of object, in this case, it's a set of instructions for building a widget within WordPress.
Using a class allows us to keep our code completely separated from the other widgets, plugins, and WordPress. Plus, it's the only way to build one in WordPress, without rebuilding large parts of WP.
It also allows us to create multiple instances of our widgets.
Instances are clones of our widget.
Think of it this way: if everyone in here drove a Toyota Camry. But we wouldn't be driving the exact same Camry, like literally the same car. We would each drive our own Camry. Each one can have different properties, power windows, white paint job, premium stereo, etc.
class boilerplate_widget extends WP_Widget {
boilerplate_widget is the name of our example class
Extends:
Inherits the methods and properties of another class
In this case, our widget inherits the methods and properties of the WP Widget class. All we need to do is define our widget's unique properties and functions.
So, there are five parts you have to have for your widget.
            function __construct() {
              $name = __( 'Slushman Boilerplate' );
              $opts['description'] = __(
                'Create your own widget using this code.',
                'slushman-boilerplate-widget'
              );
              $opts['classname'] = '';
First is the constructor for our widget. It tells WordPress two pieces of information:
The name of the widget
The description of the widget
You can optionally include a classname in the $opts array.
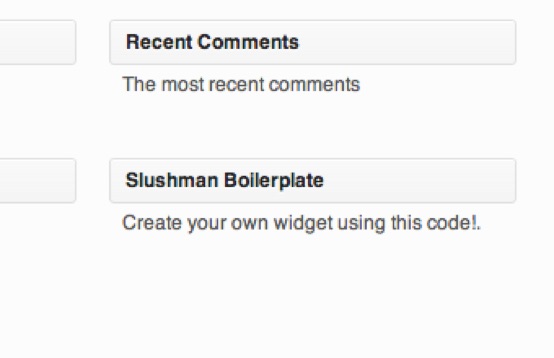
These are what you see when you look at the Widgets page to choose a widget.
              parent::__construct( false, $name, $opts, $control );
            } // End of __construct function
parent::__construct() refers to the WP_Widget class
This tells the WP_Widget class to create a new widget with this and description.
False refers to an optional parameter for construct that allows you to specify the base of the your ID attributes for your widget. If you just use FALSE here, it uses part of the unique class name. This argument does need to be unique, so I've found its better to just let WordPress figure this out for you.
$control = array( 'width' => '', 'height' => '' );
There is a fourth argument that can be passed here, which sets the width and height of the widget, but height is currently not used.
I've rarely seen a need for this last argument.
If your widget is going to be wider than 250px, the width argument is required.
function form( $instance ) {
The form() function creates the form you see on the widget page
This function has one parameter, $instance, which contains the settings for that instance of the widget.
            $defaults['title'] = 'Boilerplate Widget';
            $instance = wp_parse_args( (array) $instance, $defaults );
$defaults is an array of the default settings for the widget.
Next is wp_parse_args(), which takes the defaults and merges the defaults array with the $instance array. The $instance array takes precedence, so the settings you've set there override any settings in $default.
We reassign this to the $instance variable to use for the rest of this function
              $textfield = 'title';
              echo '<p>
                <label for="' . $this->get_field_id( $textfield ) . '">'
                  . __( ucwords( $textfield ) ) . ':
                  get_field_id( $textfield ) . '"
                    name="' . $this->get_field_name( $textfield ) . '"
                    type="text"
                    value="' . esc_attr( $instance[$textfield] ) . '" />
                </label>';
            } // End of form function
Basically, we're creating the HTML for a field, but there are some specific WordPress bits we need to use instead of the standard HTML.
Lets break this down into individual easier to read chunks so we can see what's going here
$textfield = 'title';
First, we'll assign the $textfield variable the name of our field, which makes it easier to use. In this case, the field name is “title”.
            echo '<p>
            <label for="' .
            $this->get_field_id( $textfield ) . '">' .
            __( ucwords( $textfield ) ) . '
To start the input field, we wrap it in p tags, which just spaces them out nicely.
Then, we create the label for the field.
The “for” attribute on the label tag needs the field's ID, which we get using the get_field_id() function.
get_field_id() creates a unique ID for this field for this instance and it uses the field's name, so we give it that using the $textfield variable. So it may end up being something like “title15” or something. It just needs something unique compared to every other widget title.
Then, as the label for the field, we capitalize the $textfield variable for the actual field label using the PHP function ucwords(), which capitalizes the first letter of each word.
This will give us the field name “Title” with a capital T.
            function update( $new_instance, $old_instance ) {
              $instance = $old_instance;
              $instance['title'] = sanitize_text_field( $new_instance['title'] );
              return $instance;
            } // End of update function
We do that with the update() function.
function update( $new_instance, $old_instance ) {
update() needs the new $instance, which are the values being submitted from the form() function and the old $instance, which are the values already saved.
$instance = $old_instance;
First, reassign $old_instance to $instance, which creates a new array of values to work with in the rest of the update function.
$instance['title'] = sanitize_text_field( $new_instance['title'] );
Then we reassign that particular value with the new value. $instance is an array of values, which means it contains several values assigned with names.
In our case, we only have “title”, so we save the new value from the form. If you had more than one field in your form, you'd have a statement for each field.
sanitize_text_field
But we sanitize the input first using the sanitize_text_field() function.
Without sanitizing first, it is possible to write a statement that damages our database and submit it through the widget form.
Since we're using a text field, WordPress has this built-in function, sanitize_text_field, that removes line breaks, tabs, extra white spaces, strips tags and octets, and converts < characters into HTML entities that can be saved safely in the database.
              return $instance;
            } // End of update function
Lastly, the new $instance is returned, which tells the WP_Widget class to save the new values.
            function widget( $args, $instance ) {
              extract( $args );
              echo $before_widget;
              $title = (
                !empty( $instance['title'] )
                  ? apply_filters( 'widget_title', $instance['title'] )
                  : ''
                );
              echo ( !empty( $title ) ? $before_title . $title . $after_title : '' );
              echo '<div id="sidebar-me">';
Then we come to the widget() function. This is the actual widget output you see on the sidebar.
I've broken this function down into three parts to make it easier to see what's going on here. What you see here is the top of the function.
function widget( $args, $instance ) {
You'll notice there are two parameters, $args and $instance.
$instance is the same thing we've seen before. It's an array of values related to that particular instance of the widget.
$args comes from the WP_Widget class and contains some HTML and bits for use in the widget.
            extract( $args );
            echo $before_widget;
The first thing we do is create variables from all the items contained in $args using PHP's extract function.
Then we echo the $before_widget variable, which starts the HTML for the widget output.
            $title = ( !empty( $instance['title'] )
              ? apply_filters( 'widget_title', $instance['title'] )
              : ''
            );
Next, we create the $title variable by checking if $instance has a value for the title, if so we check for any filters for the widget's title and assign it. If there is no value for the instance title, the $title variable is just blank.
This is useful when you want a widget, but don't need to the title bar, so you just set the title field to blank.
echo ( !empty( $title ) ? $before_title . $title . $after_title : '' );
If there is a value for title, we output the before_title HTML, the title itself, then the after_title HTML.
echo '<div id="sidebar-me">';
After that, we echo an HTML div that begins the wrapper for the widget content.
The second section of the widget function is…
This next part is the output of your widget. It will vary based on what your particular widget does.
                echo '</div><!-- End of #sidebar-me -->';
                echo $after_widget;
              } // End of widget function
            } // End of boilerplate_widget class
After your content, we echo the end of the content div, then the $after_widget HTML.
Notice, we're also ending the class too.
But we still have one bit of code we'll need for our widget to run in WordPress.
            add_action( 'widgets_init', 'slushman_boilerplate_widget_init' );
            function slushman_boilerplate_widget_init() {
              register_widget( 'boilerplate_widget' );
            } // End of slushman_boilerplate_widget_init()
This is the last code needed for a widget.
add_action( 'widgets_init', 'slushman_boilerplate_widget_init' );
add_action tells WordPress when you run this function, run this function too. In this case, when WordPress runs widgets_init(), run our function, slushman_boilerplate_widget_init(), too.
By the way, that function name does need to be unique, since we're not using within the class.
            function slushman_boilerplate_widget_init() {
              register_widget( 'boilerplate_widget' );
            } // End of slushman_boilerplate_widget_init()
In slushman_boilerplate_widget_init (), we register our widget, using the unique class name we created at the top.

Now, when we activate our widget plugin, WordPress will add the Boilerplate widget to the list of widgets in the Widget admin.

What kind of widget do you want to create then?
What has no one else created that you want to create?
Show off the Latest LOLcat widget